Telegram API: Building a weather bot in 30 lines of code
Published 2020-03-22
Table of Contents
Over the last few months I have been playing around with the Telegram API for a couple of personal projects and I’ve been really impressed with how easy it is to set up and how handy it is receiving custom notifications and messages delivered automatically to my telegram inbox.
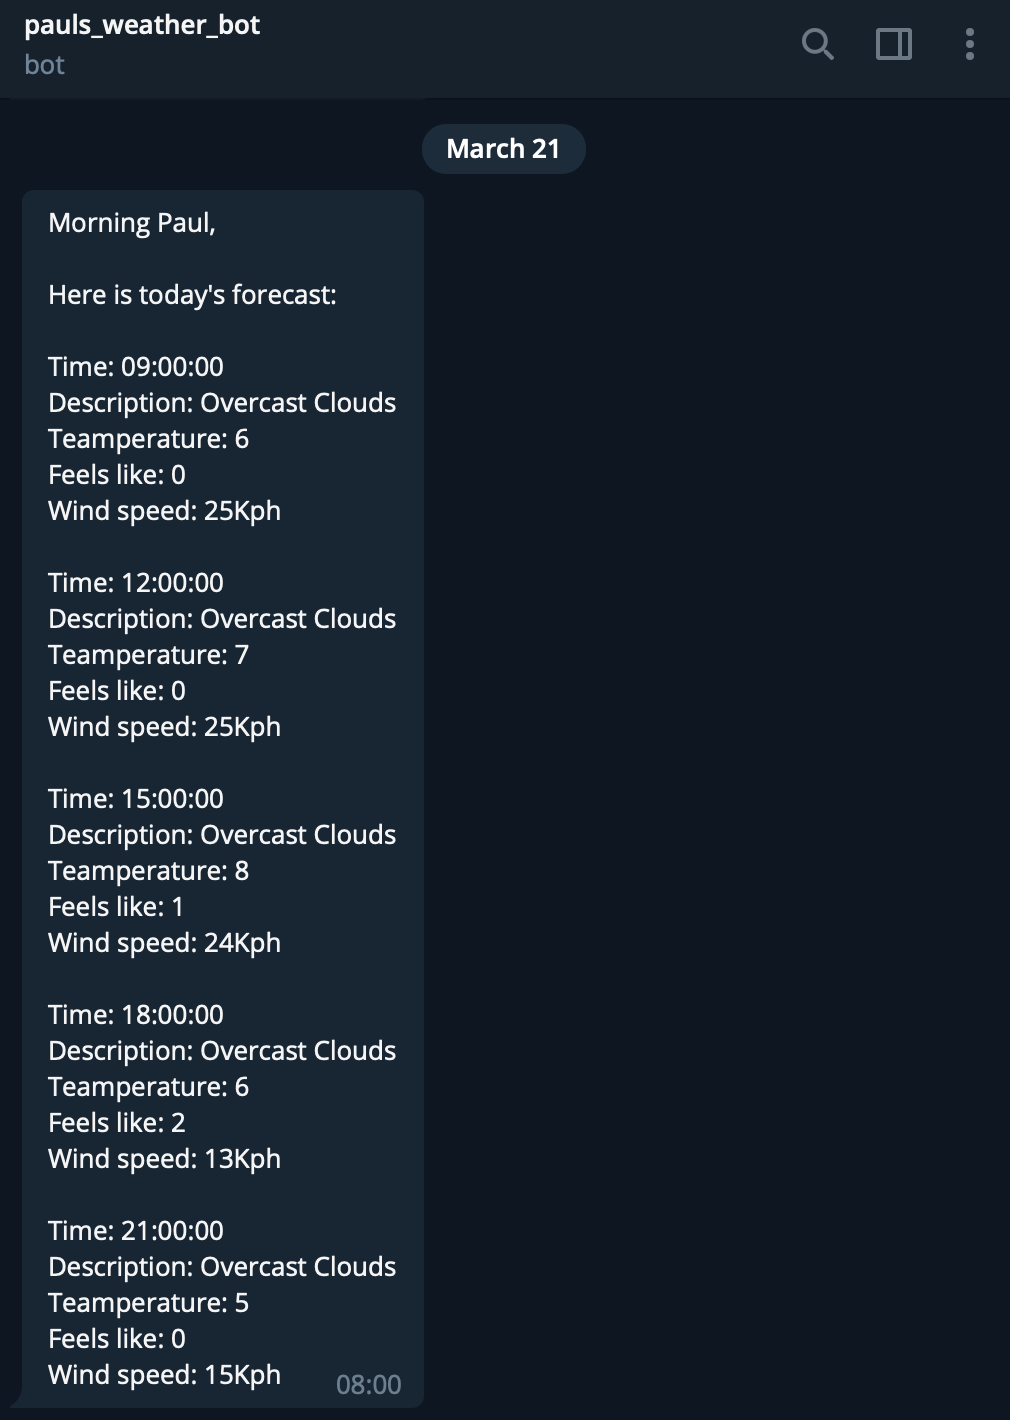
In this post, I will show you how to create a simple weather bot in 30 lines of code using the Telegram and OpenWeatherMap API’s. This bot will use the OpenWeatherMap API to get daily forecasts for a particular city, format them as a message, and send it as a Telegram message every morning.
As always, the full code is available for download from my GitHub repository, enjoy!
Creating a telegram bot
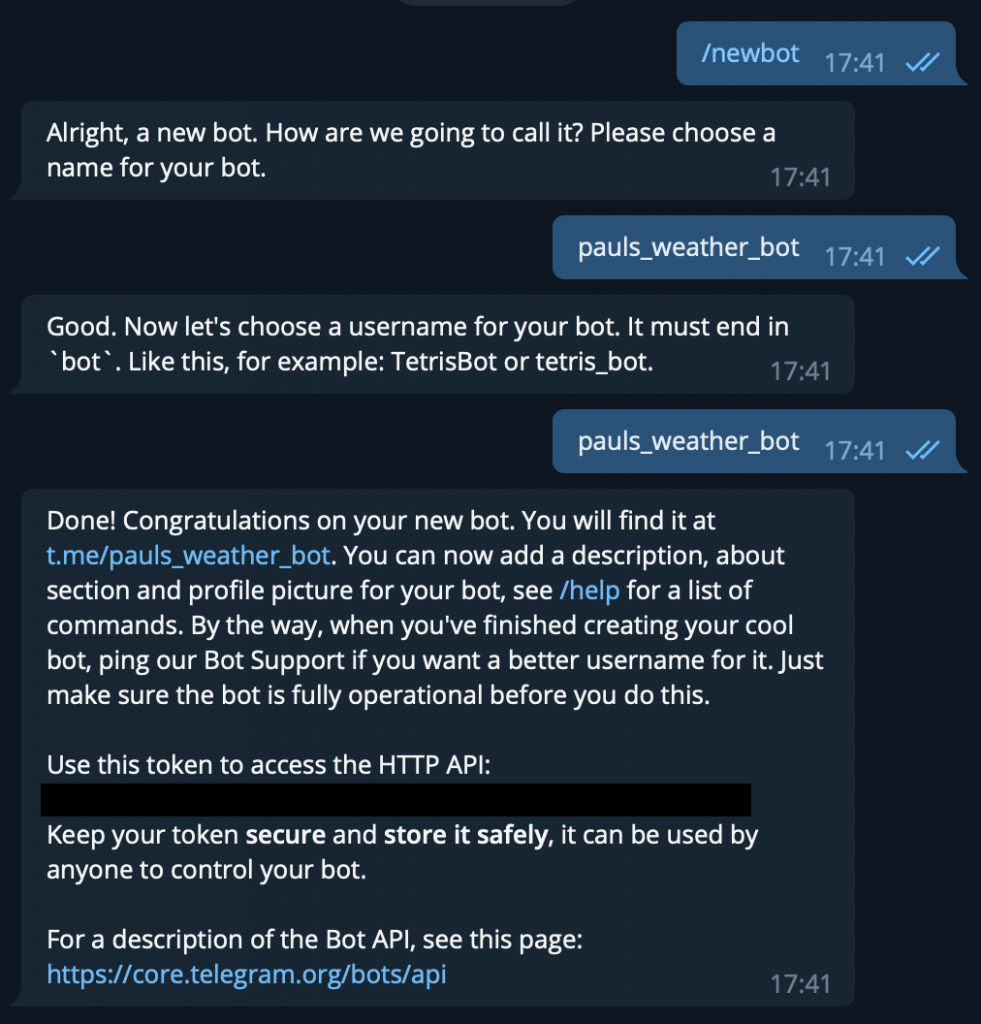
Before we do any coding, we’re going to need to set up a telegram account for our bot and obtain a bot token which we will use to send messages from the bot. Thankfully telegram makes this incredibly easy and all we have to do is start a conversation with The Botfather. As demonstrated below, we simply send The Botfather a message saying “/newbot”. The Botfather will then ask you a couple of questions about naming your bot before setting it up and giving you your bot token!
Once you have your bot set up you will need to start a chat with it and get your chat ID (we will need this later). To do this, just send your new bot a message (by searching for it in the Telegram app), then go to the URL below and copy down the id value within the chat object:
https://api.telegram.org/bot<YourBotToken>/getUpdates
Getting access to the OpenWeatherMap API
Once we have our telegram bot set up we will need a mechanism for receiving weather forecasts. To accomplish this we will use the OpenWeatherMap API. This free and easy to query API will allow us to send a request and receive weather forecasts (for every 3 hour interval) over the next 4 days!
To get your API key simply create an account, visit the hourly forecast API page, and subscribe to the free tier.
Finally, before you start coding and querying the API you will need your city code. This is simple a code which OpenWeatherMap uses to identify each city . You can get this code by searching for your city here and extracting the code at the end of the URL of your cities page. For example, my home city Dublin’s code is 2964574, which I parsed out of the below URL.
https://openweathermap.org/city/2964574
Requesting data from OpenWeatherMap
Now that we have our tokens and keys we are ready to start coding!
To get the forecast for your city you will simply use the code below, and Python’s requests module to send a request to the OpenWeatherMap API using your API key and city code.
import requests
import os

# send request to API for forecast
url = f"https://api.openweathermap.org/data/2.5/forecast?id={os.environ['OPEN_WEATHER_LOCATION']}&" \
      f"APPID={os.environ['OPEN_WEATHER_TOKEN']}&mode=json&units=metric"

data = requests.get(url).json()
This will return the forecast for your city for the next 4 days in a JSON format. An example of this can be seen below:
{
  "dt": 1584824400,
  "main": {
    "temp": 6.45,
    "feels_like": 1.39,
    "temp_min": 5.35,
    "temp_max": 6.45,
    "pressure": 1025,
    "sea_level": 1025,
    "grnd_level": 1016,
    "humidity": 65,
    "temp_kf": 1.1
  },
  "weather": [
    {
       "id": 804,
        "main": "Clouds",
        "description": "overcast clouds",
        "icon": "04n"
    }
  ],
  "clouds": {
     "all": 100
   },
  "wind": {
     "speed": 4.47,
     "deg": 122
   },
  "sys": {
     "pod": "n"
   },
  "dt_txt": "2020-03-21 21:00:00"
}
Sending a message through the telegram API
Now that we have the weather forecast for the next few days we can format this data into a string that will be sent by our bot. In this example I will pull out the first 4 items from the forecast JSON (the next 12 hours) and format them into a good morning message.
To achieve this I simply loop through the first 4 elements of the list object within our JSON data and append them to a long string.
from datetime import datetime

weather_message = "Morning Paul,\n\nHere is today's forecast:\n"

for forecast in data['list'][0:5]:
    time_as_dt = datetime.strptime(forecast['dt_txt'], '%Y-%m-%d %H:%M:%S')

    weather_message += (f"\nTime: {time_as_dt.strftime('%H:%M:%S')}\n"
        f"Description: {forecast['weather'][0]['description'].title()}\n"
        f"Temperature: {int(forecast['main']['temp'])}\n"
        f"Feels like: {int(forecast['main']['feels_like'])}\n"
        f"Wind speed: {int(forecast['wind']['speed'] * 3.6)}Kph\n") # <- convert to Kph
Once our bots message is ready we once again utilise the requests module, along with our bot token and chat ID to send a message from our bot to ourselves.
send_message_url = (
    'https://api.telegram.org/bot' + os.environ['TELEGRAM_BOT_TOKEN'] +
    '/sendMessage?chat_id=' + os.environ['TELEGRAM_CHAT_ID'] +
    '&text=' + weather_message.replace(' ', '+').replace('\n', '%0A')
)

requests.get(send_message_url)
Deploying on a Raspberry Pi
Now that we have a telegram bot capable of sending messages, the final step is to automate the sending of these messages to ourselves every morning before we leave the house.
To do this, I simply cloned my git repository onto a Raspberry Pi and set up a cronjob (example below) to run my code at 8AM every morning.
$ crontab -e
0 8 * * * <PATH TO YOUR EXECUTION SCRIPT>
Once set up you will now receive a weather forecast for the upcoming day every morning.